Saturday, March 26, 2016

Top Picks from Jan

I dislike all those lists on the internet where you have to scroll through many, many pages to get through. But I do like to read what they have to say.

I thought it would be fun to ask each of our staff what their four favorite things we have at Carolina Creations right now are, and why!

I'll start.

1. Lately I've been loosing my phone and keys. Not once in a while but almost every day! I used to always carry both in my pants pockets but my new phone is too heavy and keys to bulky, and when I took them out of my pockets I would never put them in the same place twice. So I started carrying a small purse that I wear all the time. It's hand crafted of course! When I take it off it's big enough that I can always find it. We've got many of these small purses and my favorite is this hide and leather bag.


2. Even though we have been carrying their work for a couple of years I just love the garden art poles, And I love that fact that they come out with new ones and discontinue old. I have one on our porch and it makes me feel good whenever I see it. Not only do they make poles but also bird houses, pots for plants, and bird baths.


3. One of the biggest challenges I have in finding new work for the gallery is finding hand crafted gifts that cost less than $20. I'm happy to say we have dozens and dozens of items that cost less than $20 and this one is part of a series of cards that contain seeds and a garden marker. The paper pot is embedded with seeds, so you just tear it us and bury the pieces, and water. The garden marker is made from old silverware. Very clever, very sweet.

4.  And we have some wonderful original pieces of artwork, my favorite right now is this linocut by William Hays. I love the image and since I have done some linocuts I know how much work they are. I did a blog post about how he does them, here is a link.


Of course there isn't much I don't love at Carolina Creations but at the moment these are my top four!


Thursday, March 24, 2016

RIP Ken Auster painter teacher extraordinaire

Several times in this blog I have spoken about painter and teacher Ken Auster and how he influenced my work.

He died recently, what a loss to the art community.

Today I got an email from his wife asking for some words about him.

This is what I wrote.

I had the priviledge of participating in a workshop with Ken in North Carolina some time ago.


I am a watercolorist, but an oil painter wanna be.

I am still working at that many years later, but some of the things Ken said to me I repeat to myself and to others over and over.

One issue he pointed out to me that made an immediate impact.

“it’s called painting not scrubbing” 

I was trying to paint in oils like a do in watercolors! 

I’m pretty messy, so was thriled to see his palette and suitcase at the workshop, finnally meeting someone worse than me.

His palette!


And here many years later when I’m painting around any one else, or when I’m in the gallery and someone points out that I have paint on my clothes, I immediate respond with a queote from him “all my clothes either have paint on them or will have paint on them.”

When I talk about people who have helped inspire the way I work I always mention Ken in this way.

Ken Auster was a cocky, surfer dude, that was a great teacher and an amazing artist."

Here are a couple of his paintings.


He made a great impact on me.

Tuesday, March 22, 2016

Working in different mediums

When I was in college (Siena Heights University - then college) the professors said "pick a medium and stick to it".

In college I did a little clay - all hand building, never was interested in throwing - drawing, painting - was not good at that, printmaking - silk screen printing, linoleum block printing, and others printmaking techniques. 

So when I got out of school I choose drawing, which I did exclusively for 20 years. 

This was probably a good thing since good drawing is the basis of all the mediums I work in now.

Then I decided to add some color to my drawings
art by Jan Francoeur

- then started working with watercolors


- acrylics


- oils


- painting on clay with underglazes


- hand building, and 


- calligraphy.


My artistic life is so much more interesting now!

So every day now I wake up and say - what will I work in today? Well it's not that easy, I usually have commissions to do, with the medium dictated by the customer.

Yesterday I finished a drawing of a house, it was a companion piece to a house drawing I did years ago. I can't show it here because it's a surprise. As is a platter I'm doing today.

The work I do on clay combines 4 things, I often make the piece, draw the image, paint on it (like watercolors but with glazes), and do calligraphy on it. 

Tomorrow I'll be painting in watercolor on traditional watercolor paper, also a commission - to go with a door painting I did about 10 years ago.

And here is a painting I'm almost finished with on hot press illustration board - this one I did because I wanted to!


Sunday, March 20, 2016

First Day of Spring

While it is gloomy outside Carolina Creations is FULL of bright and beautiful pieces for your home and garden.

I found a wonderful website talking about the First Day of Spring 2016: Vernal Equinox - It's the Old Farmer's Almanac. 

Here are some excerpts from their site.


Painting by Maggie Peacock at Carolina Creations
Whether you’re a sky gazer, gardener, or seek a deeper connection to the ebb and flow of nature, join the global community as we all celebrate this weekend’s vernal equinox—as humans have done since antiquity.

Astronomically speaking, the equinox (March 19 or 20 this year) marks spring’s beginning in the Northern Hemisphere (whereas it announces fall’s arrival in the Southern Hemisphere). The equinox happens at the same moment worldwide, even if our clock times reflect a different time zone.


Did You Know: 2016 will bring the earliest arrival of spring of our lifetime (thus far!) in the Northern Hemisphere. 

Meteorologically speaking, in the Northern Hemisphere, the official spring season always begins on March 1 and continues through May 31. Summer begins on June 1; autumn, September 1; and winter, December 1.

Weather scientists divide the year into quarters this way to make it easier to compare seasonal and monthly statistics from one year to the next. The meteorological seasons are based on annual temperature cycles rather than on the position of Earth in relation to the Sun, and they more closely follow the Gregorian calendar. 


 Jim and Tori Mullan Raven
Raven by Jim and Tori Mullan

Using the dates of the astronomical equinoxes and solstices for the seasons would present a statistical problem because these dates can vary slightly each year.

What is an Equinox?
At the Vernal Equinox, the Sun crosses the celestial equator on its way north along the ecliptic.

All over the world, days and nights are approximately equal. The name equinox comes from Latin words which mean “equal night”—aequus (equal) and nox (night).

Enjoy the increasing sunlight hours, with earlier dawns and later sunsets. 


On the equinox, Earth’s two hemispheres are receiving the Sun’s rays about equally because the tilt of the Earth is zero relative to the Sun, which means that Earth’s axis neither points toward nor away from the Sun.  (Note, however, that the Earth never orbits upright, but is always tilted on its axis by about 23.5 degrees.) 

 Paintings by Donna Robertson
Painting by Donna Robertson


Scientific explanation aside, our ancestors were more connected to the Sun than we are today. They observed its pathway across the sky; they tracked how the sunrise, sunset, and daylength changed, using the Sun (and Moon) as a clock and calendar. If you have ever been to Stonehenge or Machu Picchu, you’ll see examples of ancient seasonal markers.

The vernal equinox signals the beginning of nature’s renewal in the Northern Hemisphere!


Worms begin to emerge from the earth. Even the March Moon is called “The Full Worm Moon” for this reason.


Notice the arc of the Sun across the sky as it shifts toward the north. Birds are migrating northward, along with the path of the Sun.


Speaking of birds, did you know that the increasing sunlight triggers bird song? 
Jewelry by Lesley


Trees, shrubs and flowers are sensitive to temperature and daylength, too! Since ancient days, people have used them as indicators of when the weather is right for planting. For example: Blooming crocus are your cue to plant radishes, parsnips and spinach.

Glass flowers by Scott

Of course, the longer days bring warmer weather! Both we and the animals around us strip off our clothes and heavy coats!


Ready, set, plant! March is time to start gardens and sow seeds in many regions. 


Thank you Almanac!

Jan Francoeur


Wednesday, March 09, 2016

Using sprigs on your pottery

Several of our potters use sprigs to decorate their work.

What is a sprig?

Ceramic Art Lesson Plan: Making Sprigs  From Ceramics Arts Daily 

Sprig molds provide a great way to decorate your work.

Made from fossils, shells, found objects, or by carving into clay, there’s no limit to the variety. Sprig molds provide a great way to decorate your work. Made from fossils, shells, found objects, or by carving into clay, there’s no limit to the variety.


Terms

Sprig: press-molded clay piece added to leather-hard work. Sprigs are created using small molds made of bisque-fired clay or plaster.

Press mold: a mold, usually plaster, into which moist clay is pressed to create multiples.

Undercut: common flaw in plaster or bisque molds, where the clay or casting catches and will not pull free without breaking or distorting. To judge whether a mold of an object will have undercuts, look at the object from above, and slowly move your fingertip from the top of the piece down the side. If at any point the tip of your finger is hidden by the piece, that spot would translate into an undercut in a mold because the object goes from wider to narrower. When cast in plaster, the opening on the mold would conform to the narrower section, making it impossible to remove the form in one piece. Objects with undercuts require multiple-part molds and are not suitable for sprig molds.

One of our best examples of using sprigs on pottery at Carolina Creations is the work we have by Charlestowne Pottery.


The Process
Begin by using the finest grain clay you have. While porcelain is best, I used fine-grain white stoneware with good results.

Another example at Carolina Creations is pieces by Jeffcoat Pottery.

Sprigs will work best when the piece and the sprigged form are made from the same clay, and when attached at the soft leather hard stage of drying.

Note: Sprigs can be used in several ways.

They’ve been used as feet and in a surface decoration.


On a bottle sprigs form the handles and glazing highlights a sprig decoration on the side.


Here is a mold for making sprig handles. The beauty of using sprig handles is that you can get a more consistent size for your handles.

Even our potters that have been working at their craft for years can learn new techniques!

See more examples of the fabulous pottery we have at Carolina Creations by clicking here.


Saturday, March 05, 2016

Unity Through the Arts

2016 is the 2nd year for Unity Through the Arts - banners are sponsored by businesses and individuals and are hung on Broad Street, beautifying our town and letting everyone who visits know that we are a strong, closely-knit, talented community of artists.

Our resident artist (me!) is honored that two of my paintings have been chosen for banners this year.

Tuesday, March 01, 2016

Welcome William Hays with reduction linocuts

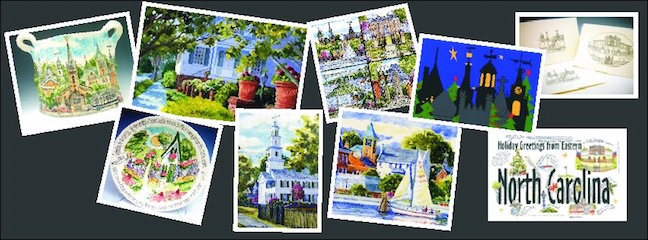
We are thrilled to be representing William Hays with his reduction linocuts at Carolina Creations. 

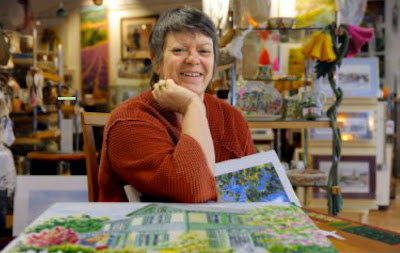
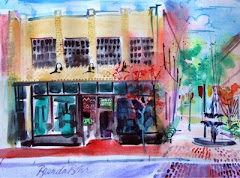
William Hays has been creating beautiful works of art for more than 40 years. He began painting in watercolors as a teenager and eventually ended up with a degree in sculpture from the University of Alaska in Anchorage. After moving to the lower 48 from Alaska in 1987, he concentrated on painting in oils. He was regularly recognized as one of the region's leading painters creating primarily landscape images. Since 2012 Hays has concentrated on printmaking.

This is a very labor intensive type of printmaking. William was kind enough to post photos of each step as he pulls the edition. 

The linoleum used is called battleship linoleum.

The waste is cut away with a tool like these.
Then the oil based ink is applied with a brayer. It's interesting that you can tell when the ink is ready to be rolled onto the linoleum because it makes a snapping sound!


What follows is a step-by-step explanation of a reduction linocut print with illustrations. I hope you will find it interesting. I do.

    
The carved linoleum block ready for the first color printing. It took two days to do the drawing on the block (in blue indelible marker) and almost another two days to do the carving for this first stage. The initial stages are often very time consuming and get lighter as the print progresses, sometimes.... The blue gray is the original surface of the block with the tan areas being the carved portions.


Step 1: Here is the print of the first color from the carved block above. As you can see, there is much planning that goes into anticipating what will happen as the subsequent colors are added.


This is the block after carving in preparation for the second color. I would love to tell you that this didn't take as long as the first stage, but it did. You'll note that the block is backward from what is printed. This creates issues when there is type involved in the image and I've made the mistake of not remembering this before... oops. The original surface is still blue-gray. The first stage of carving is stained a milky light blue from the first ink. The second stage carving is tan.


Step 2: Here's the print with the second color added. Although it is beginning to take shape, there is much more to add from here. You'll note the three holes on the left-hand side of the paper. These are fitted to pins on the press bed to keep the paper in the same position every time so that the colors line up (register) correctly. This tab is removed after the print is finished.


 Step 3: (No need to show you the block each time.) Now it's really coming together with the third color and you can clearly see where it is going from here.


Step 4: The fourth impression involved the use of two colors. The ink is applied to the block with the brayer. Because there is significant space between the two colors, I can roll them on separately without overlap. The upper color (violet-gray) uses a fair amount of opaque white and breaks the usual order of color application (light to dark) by going lighter than the previous color.


Step 5: This impression also used two colors - a dark violet-gray on top and a dark brown-green on the bottom. You can see that the nature of the image has changed considerably with the addition of these dark darks. It begins to really snap together.


This is what the block looks like after all the carving is done and before printing the last color.


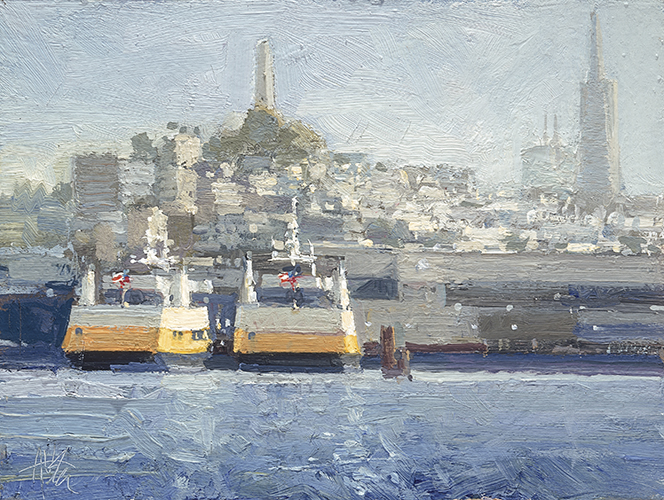
"Seaside Rest" 8-color Linoleum Block Print, 9" x 12" 
Step 6: The final color, a violet-black pulls everything together and the print is finished. I started out with 48 sheets of paper and ended up with 39 acceptable prints. The rest had registration problems where the paper stretches or the block shifts during printing. The result is an uncomfortable double image look that I don't include in the edition. I let the print completely dry for a couple of days (oil-based inks), trim off the registration tab and then sign and number each print to finish off the process.

We hope you'll come in and see more of William's work.