Thursday, March 28, 2013

Ponochos and scarves

We've been pleased with the sales of our new jackets and scarves. So much so we are adding many new artists!

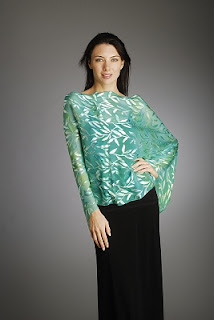
This week we have received one-seam ponchos that can be worn in many, many different ways.

They are made out of silk or chiffon, and are hand dyed.

The even come with a cd that shows you the many ways they can be worn.

Beautiful colors, beautiful fabrics, great design.


Stop in and see them!

Tuesday, March 26, 2013

How to Make a Piece of Pottery

Sometimes people ask why a piece of pottery costs what it does. A few years ago I found this somewhere (sorry I can't remember where) and just ran across it again and wanted to share.
What Goes Into Making a Piece of Pottery?
(so glad you asked!)
Using a mug for an example you
1. Pick up clay -OR pay $$$ to get it delivered.
2. Unload truck - load clay into studio.
3. Weigh out amount needed.
4. Wedge (knead) clay.
5. Center clay on wheel and throw the mug shape.
6. Remove from wheel and let dry 24-48 hours; depending on humidity.
7. Put mug back on wheel and trim.
8. Hand create handle.
9. Let handle dry 1 to 5 hours, depending on humidity.
10. Attach handle to trimmed mug.
11. Cover handle in hot wax to slow drying on very dry days.
12. Let dry 1 week minimum. If mug cracks at this point, re-cycle clay and start over at step 3.
13. Take mug to kiln in the and fire to ~1800 F - about 15 hours.
14. Take mug back to the studio for glazing. If mug has cracked during 1st firing, discard to the landfill and write off.
15. Mix glaze(s). Each glaze requires approximately 3 hours to weigh mix and sieve.
16. Put wax on the bottom of mug so it does not get glaze on it that will stick to kiln shelf.
17. Choose design and glaze mug. This can be a quick dip - or an elaborate design taking an hour or more to create.
18. Let mug dry thoroughly.
19. Bring mug back to the kiln and place gently within the kiln. If glaze scratches or gets bumped on journey, wash with hot water, let dry, and start back at step 13.
20. Fire glazed mug to approx 2150F; approximately 24-28 hours depending on electricity demands.
21. Hold at peak temperature for approx. 20-30 minutes. Make sure all shelves reach the same temperature (cone); then slowly fire down.
22. Wait around 14 hours for kiln to cool to under 400F before opening.
23. Remove and check mug. If cracked, write off. Start over at step one.
24. If mug has miraculously survived to this point, clean sharp bits off bottom with grinding stone by hand, and put out for sale (!)

Friday, March 22, 2013

Don't we know


Wednesday, March 20, 2013

Easy way to arrange flowers in one of our beautiful vases

Our new flower arrangers have arrived! They are very clever, come in a few different sizes, and make it so easy for anyone to create a great looking flower arrangement.


Easy Arranger is the bloom-shaped, bendable, reusable grid fits over the top of your vase, we have 3 sizes 4", 5", and 6". 4" fits vases up to 3 1/2" wide, 5 " up to 4 1/2" wide, 6" up to 5 1/2" wide.

HOW TO USE
Follow three simple steps to easy flower arranging or creating DIY wedding flowers or centerpieces:


Step One:
Bend Easy Arranger™ over the top of your choice of vase or vessel. 
image.


image
Step Two:
Insert cut flower stems starting from the center.


image
Step Three:
Add flowers evenly around until full.
 
Tip:
To change water simply lift crown off from the base. Flowers will stay in place while you add fresh water.
FLOWER ARRANGING TIPS
Stop by a florist or supermarket where you'll find a wide selection of flower bouquets to choose from.
Once home, follow these steps to keep your arrangement looking fresh for longer:
  • Re-cut flower stems on the opposite angle from which they were originally cut. This will open up the stem and allow the most water to get inside.
  • Cut stems under water to prevent air from penetrating the stem.
  • Add the package of preservative that came with your bouquet to warm water and place your re-cut stems in the water. The preservative contains sugar to feed your flowers and a disinfectant to kill bacteria which can prematurely kill cut flowers.
Create your arrangement in a variety of household items such as a teapot, ceramic pitcher, low glass bowl, or wine bucket.

Or turn one bouquet into multiple small arrangements by using a bud vase, decorative water glass, or wine glass.

Source: The Society of American Florists and renowned researcher, Jeannette Haviland-Jones of Rutgers University.

Purchase online from us by clicking here!


Saturday, March 16, 2013

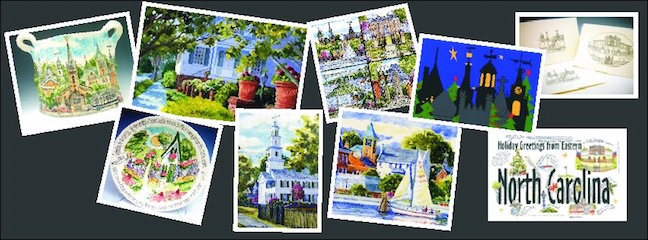
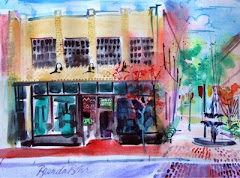
New Work at Carolina Creations by Brenda Behr

One of my favorite times of the year is when the cotton is in the fields!

It is also North Carolina Artist Brenda Behr's favorite time and has delighted in painting the fields. She tells me she has a hard time during this period each year because she compelled to spend every waking hour painting en plein air.


If you can't get in to see these new painitngs you can see the details on our website by clicking here!
Thursday, March 14, 2013

Slow Blogging

I realize that I haven't kept my blog up the past 2 months.

I try to do 10 posts per month for consistency but realize I failed in February.

As stated in a previous post we were in Florida for the MONTH (yikes!! that NEVER happens), I thought I would keep up my usual schedule but as the vacation progressed it actually became a real rest. I painted a few small pieces early in the month but by week three I realized how much I really just needed to rest my mind and body.

What a luxury!

At any rate when we did return home our loyal customers had a list of pottery pieces I needed to make for them so the past 10 days have been a whirlwind of glazing!

- baby sets
- wedding celebration pottery pieces
- house warming gifts
- going away
- anniversary tiles
- memorial gifts

Hope to get caught up this week and get back to normal.

What a beautiful day it is today in New Bern!

Monday, March 11, 2013

Congratulations Brenda Behr

Congratulations to our dear friend and Carolina Creations gallery artist Brenda Behr for winning Best in Show at Community Council for the Arts Annual Show!

Stop in at Carolina Creations to see some of her work!

Sunday, March 10, 2013

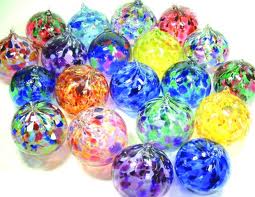
Glass ornaments arriving

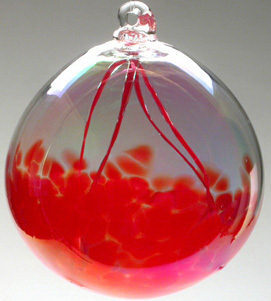
One day we woke up and realized we had very few glass balls. Yikes!!

Atlantic Art Glass - these are so much prettier in real life!

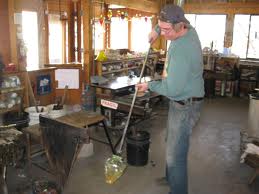
Atlantic Art Glass being made!

Rick and Val Beck, NC
Rick finishing some pieces
Lisa Oakley, NC

Lisa's work!


Virgil Jones, NC     Friendship balls

Virgil's Witches Balls


People collect them and we always like to have a nice selection. We hit a great streak of luck this winter finding some new ones and they have begun to arrive. Here are just a few with more to come!

We've made an Easter Basket full of Virgil's and it looks beautiful with all the pastel colors.

We even have very large balls for the yard and garden. They can be left out all year long. A customer was in yesterday and said she hangs the large ones in her trees and they look beautiful! We also have stakes you can wire them to and stick them in the ground.

Wednesday, March 06, 2013

March Newsletter hits the net

If you don't get our monthly newsletter here is a link to it!

Each month we try to keep our readers informed about what's going on in our Downtown, offer a Downtown Calendar of events, talk about our monthly featured artist, and introduce new art and artists.

At the end of each newsletter we have a monthly giveaway. Just email us and we'll enter you in the drawing!